Holidays are always the hardest to deal with when it comes to living away from my immediate family.  They bring me back to my childhood when that one holi-day would turn into the biggest day of the year because my grandma would start making phone calls four weeks in advance fretting about who is making the turkey and whether or not we should do dinner on the Sunday or the Friday? Or maybe even the Monday just so everyone including their sister’s husband’s mother’s cousin and her dog could come.  It was a big day, or week(s) rather and it may sound stressful but in the end it was worth it.  To spend time with family and loved ones, it was well worth it.

Easter specifically was always a holiday to look forward to because obviously it involved copious amounts of chocolate.  I will always remember tip-toeing down the stairs in the early morning with my eyes slightly closed (but not really at all) anticipating the spread that would be on the table.  There would always be two baskets (three if my dad was lucky that year) filled with chocolate bunnies and eggs and two matching pastel coloured dresses with matching polka dot socks and perhaps a headband with an overwhelmingly large flower or bow attached.  It was like Christmas all over again…But better because the sky was blue, the sun was shining, the birds were chirping, the flowers were blooming AND there was a treasure outside waiting to be found.

I have obviously (maybe…?) grown out of the stage where I need a treasure hunt laid out for me and a brand new purple and yellow dress to try on, but I am definitely not over needing my family around to laugh, cry and argue with, nor am I over the chocolate.

So in an effort to bring me back to my childhood Easter’s filled with chocolate and family, I made carrot cake cupcakes topped with cream cheese icing and Cadbury mini eggs (MMM…I can’t. Get. Enough.)  But for some reason I just can’t bring myself to make a sugar laden dessert (that’s where my family comes in, but also when I refrain from using a measuring cup like my mother) so they are carrot cupcakes with a twist.  The carrot cake cupcake recipe is 100% vegan but the icing is made with dairy so if you are looking for a vegan dessert then maybe try subbing tofutti for cream cheese, or another vegan frosting recipe.

cupcakes

Carrot Cake Cupcakes with Cream Cheese Icing
* Adapted from OhSheGlows

1 1/2 cups grated carrot
10-12 Medjool Dates, soaked in boiling water until soft
1/4 cup unsweetened apple sauce
1/8 cup coconut oil
1 tbsp milled chia seeds
3/4 cup almond milk
1 tsp apple cider vinegar
2 tsp. orange zest

1 1/2 cup spelt flour
1 1/2 tsp. baking powder
1 tsp. baking soda
1 tsp. cinnamon
1 tsp. ground ginger
1/2 tsp. cloves
1/2 tsp. nutmeg
1/4 tsp. Himalayan Sea Salt

1/4 cup raisins, soaked
1/3 cup pumpkin seeds, chopped

Cream Cheese Icing

1/2 cup coconut powdered sugar (in a blender combine coconut sugar with 1 tbsp of arrowroot starch and blend until a tan colour light powder forms)
1/2 cup cream cheese, or tofutti
1/4 cup coconut oil

1. Preheat oven to 350 degrees and then fill a muffin tray with muffin cup liners. In a food processor, puree the soaked dates along with about two tablespoons of water until a thin paste forms. Pour into a large mixing bowl, along with the carrots, apple sauce, oil, vinegar, chia, milk, and zest. Stir to combine and then set aside.

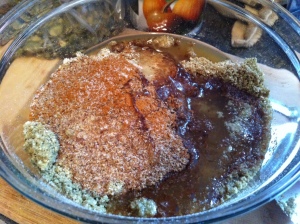
2. Combine all of the dry ingredients in a separate bowl and then slowly fold into the wet. Before it is completely stirred, add the raisins and pumpkin seeds and finish combining. But try not to over mix.

3. Spoon 3-4 tbsp. sized scoops into each liner. Bake for about 35 minutes or until the top has lightly browned and an inserted toothpick or knife comes out clean. Let cool for ten minutes and then transfer to a wire rack to finish cooling.

4. To prepare the icing, in a food processor puree the cream cheese and coconut oil until soft and then slowly add in the coconut powdered sugar. Blend until fully combined and you have reached a desired sweetness and consistency.  The icing will be a slightly darker colour than what you may be used to for cream cheese icing but that is because of the colour of coconut sugar.  If you want white icing, feel free to use regular powdered sugar.  Scoop into a piping bag and store in the fridge until ready to frost. Once the cupcakes have completely cooled you can ice and decorate them.

cupcake2

I recommend storing the finished cupcakes in the fridge because the icing may melt in warmer temperatures from the coconut oil and/or go bad due to the dairy.

Enjoy!! And Happy Easter 🙂

I have spent so much of my life looking forward to tomorrow, next week, next month, or even next year.  In the early stages of growing I remember feeling like time was going by so slowly.  I was always just anxiously waiting for the week or month to go by because there was something to really look forward to at the end of it all.  But once I got to it, it never really felt like it was worth it.  It really didn’t feel like it was worth losing sleep over or spending the days prior to it NOT to their fullest.  Yet, I would do it again and again; I found it so hard to just live in the moment.  I wanted to be stronger, bolder, smarter, older and happier.  Why did I think that I would have everything figured out and perfect if I was just older?

Yesterday I spent the day writing “May 18” on everything and it wasn’t until I verbally said to a classmate of mine “I can’t believe that it’s already May” and she responded “umm, it’s actually March” that I realized what I was doing.  While I have noticed that time is FLYING by lately (my mom said it does as you get older) I didn’t realize that I was actually a strong acting force in pushing it forward.  I was living in a snow covered May while everyone else was still in March.

That’s when I stopped and tried to take ahold of me and my subconscious thoughts.  There is barely enough time in the day to do everything I want to get done so rather than dwelling on the fact that I may not be able to I just have to DO.  I just have to LIVE IN THE MOMENT and DO WHAT I CAN to be HAPPY right NOW.  I am strong, bold, smart, happy, but I am not old.  We are all strong, bold, smart, happy and we’ll never be old.  We’ll just have more experience.

So when I saw my bananas getting darker and more experienced in that fruit bowl I thought that NOW was the perfect time to make banana bread.  I had been thinking about it for so long; so instead of dwelling more on what ingredients I would use and the fact that I didn’t actually own a loaf pan I decided to just DO it.  After braving the sleet/snowstorm in order to purchase a loaf pan form the corner store I rolled up my sleeves and got to work.

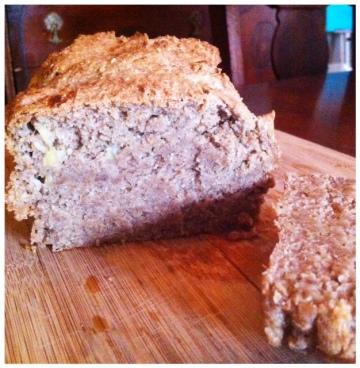
bananabread3Gluten Free Banana Bread

* Makes one 8 X 2 loaf
* note: I made all of my flours from scratch but they can be bought already made — but measurements may be slightly less than noted if using pre-made flours

1 cup gf rolled oats, ground into flour
3/4 cup raw buckwheat groats, ground into flour
1/2 cup plus 2 tbsp. raw cashews, ground into flour
2 packets stevia
3 tbsp. chia seed, milled
6 tbsp. water
3 overripe bananas, mashed
3 tbsp. unsweetened applesauce
2 tbsp. coconut oil
2 tbsp. coconut sugar (double if you like a sweeter bread)
1/3 cup unsweetened almond milk
1 tsp. baking powder
1/2 tsp. baking soda
1/2 tsp. Himalayan Sea Salt

1. Preheat oven to 350 degrees and grease loaf pan with a little bit of coconut oil. Set aside. In a large bowl, combine all of the flours, 1 tablespoon milled chia seeds, stevia, baking powder, soda and salt. Set aside.

2. Add the 6 tablespoons of water to the remaining milled chia seeds and stir. Set aside to allow to gel up to make an “egg-like” texture.

2. In a small sauce pan on medium heat, melt the coconut oil. Stir in the coconut sugar to coat, and then add the apple sauce to make a syrup. Mash in the banana and then whisk in the “chia egg” and the almond milk. Pour the wet into the dry and stir to combine. Be sure not to over stir to ensure that the loaf will rise properly. It will be sticky; gluten free flours are. Pour into prepared loaf pan and roughly spread the top even.

3. Bake for approximately 50 minutes or until the top is golden brown and an inserted toothpick (or incense stick) comes out clean. Allow to sit for 10 minutes before removing from pan. Then allow to sit for 10 more minutes after removing to guarantee a clean cutting job.

bananabread4

Smear on a bit of coconut butter, butter, nut butter, or leave plain and enjoy!  This bread is super moist and has a very subtle sweetness so it can be enjoyed for breakfast, a snack or a dessert depending on how you feel!

GF Banana Pancake

As much as I love sleeping in, I would rather spend that extra time in the morning relaxing with a hearty breakfast, a hot cup of tea, and the local paper’s crossword.  Whether I have a big day ahead of me or not, it is just that little time with myself that I really look forward to when I fall asleep at night.  That and what I have on the menu for daybreak!

I prefer to put something warm in my tummy, especially on cold winter mornings when the only source of light comes from the one you turn on above the breakfast table.  My go to is usually a warm bowl of oatmeal topped with goat yogurt, fruit and any nut butter or seed I find in my fridge and cupboard.  But we all know that change is very important, even if it’s something small like what’s in your breakfast bowl!

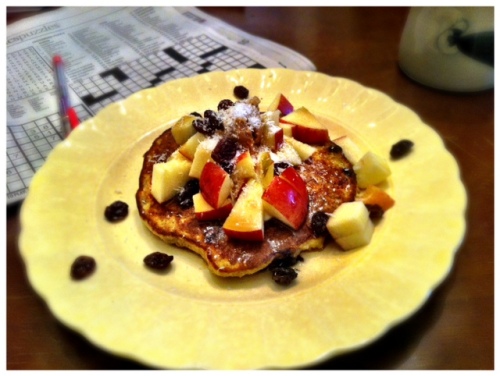
Lately I have been experimenting and revamping a pancake recipe that has been good each time but I think I have finally mastered it enough to share.  It can be made in one bowl, has few ingredients (which also happen to be nutrient rich,) and is really quick and simple to put together even if you don’t allot as much time as I do for breakfast in the morning.

The best part is that you can top it with as much or as little as you want depending on how hungry you are or what the day ahead of you looks like.

pancake1

Single Serving Blueberry Banana Pancake Pancake

1/2 Banana
1 egg
1/4 cup gf rolled oats
1 packet stevia
1 tbsp. coconut flour
1/8 tsp. cinnamon
1/8 tsp. baking powder
2 tbsp. frozen blueberries
1/2 tsp. coconut oil

1. Mash the banana with a fork and then whisk in the egg. Stir in the oats, flour, stevia, cinnamon and baking powder. Fold in blueberries.

2. Grease a frying pan on medium heat with coconut oil. Pour the batter onto the pan in such a way that you form one big round pancake with it. When bubbles begin to form on the top it is time to flip. This usually takes about 5 minutes. It’s ready when it has nicely browned on each side.

3. Top with your favourite ingredients, or try a combination of my favourite!

Optional toppers
– goat yogurt
– fresh fruit
– nut butter
– chopped nuts
– raspberry puree
– dried fruit
– cacao nibs
– coconut flakes
– agave nectar
– granola
– coconut oil
– hemp hearts
….

pancake2

The list is infinite. Open your taste buds. Be creative. Be the change. Enjoy.

This past week I discovered a smell that I had never been subjected to before…A smell that many may never be subjected to unless you find yourself knee deep in compost, in the midst of an extreme heat wave in Texas, or faced with an overflowing box of grapefruit.

I was faced with the latter.

Last week, after a nice visit with Adam’s parents, we became parents to a heaping cardboard box of juicy Ruby Reds.  Now, don’t get me wrong, we are huge fans of grapefruit…Big or small…White or pink…But seeing this load of grapefruit steaming before my eyes, I suddenly started to feel defeated.  How on earth were we going to get through this many grapefruit before they started turning and growing mutant limbs of their own?

Adam didn’t hesitate for one second.  Immediately upon saying good-bye, he rolled up his sleeves and began peeling…And peeling…And peeling.  And then he started blending…And blending…And blending.  After a good day or two, he had successfully peeled, blended, and froze nearly 30 grapefruit.

Now even though we have to be extra cautious when it comes to opening the freezer these days to avoid being catapulted in the head by a pink hockey puck, I’d say our grapefruit overload is pretty much under control….Emphasis on the pretty much.  There are still, to this day, TWO more grapefruit sitting out in the fruit basket just waiting ever so patiently to be eaten…And it is those TWO grapefruit that have turned me away from ever freshening the air with a spritz of citrus, soaking in a hot tub of grapefruit water, or exfoliating with a sugar grapefruit scrub.

The smell of an overripe grapefruit is overpowering.  There is no way of masking the wretched odour that develops from a grapefruit just a mere two days too old.

But on that note, I still have a few dozen hockey pucks to get through this winter. So let’s get started, shall we?

grapefruit2

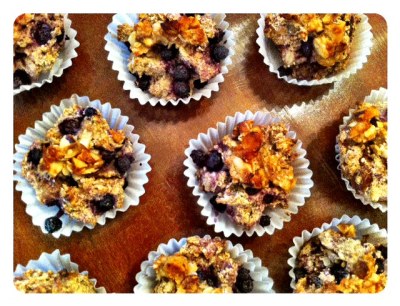
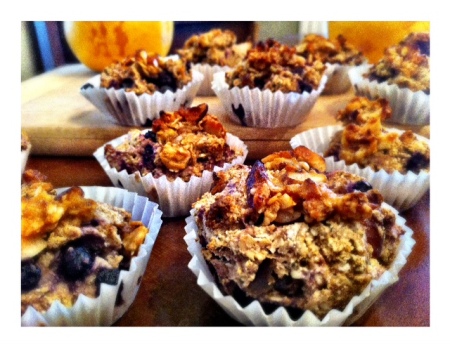
Gluten Free Blueberry Grapefruit Date Muffins with a Brazil Nut Streusel

* yields 12 small muffins

1 cup gf rolled oats
1/4 cup coconut flour
3 tsp. stevia
1/2 tsp. baking powder
1 tsp. cinnamon
1/8 tsp. sea salt

3/4 cup grapefruit puree
3 tbsp. chia seeds
1/4 cup non dairy milk
3 tbsp. coconut oil

1/4 cup chopped dates
1/4 cup frozen blueberries

Streusel Topping

1 tbsp. rolled oats
2 tbsp. Brazil Nuts, roughly chopped
1 1/2 tbsp. unsweetened apple sauce
1/2 tbsp. coconut oil
1/2 tbsp. coconut sugar
1/2 tsp. cinnamon

1a. In a small sauce pan or microwave safe dish, combine all ingredients and stir until fully melted. Set aside to top muffins with after!

1b. Preheat oven to 375 degrees. Line a muffin tray with liners or grease and set aside. In a blender, puree the grapefruit and the chia seeds to create a smooth gel like substance. Then blend in the milk and coconut oil. Set aside.

2. In a large bowl, combine the dry ingredients. Pour the wet into the dry and stir. Fold in the blueberries and dates. The mixture will be quite thick because of the coconut flour but don’t fret.

3. Spoon the mixture into the individual cups and then top each one with about 1/2 tsp. of the streusel topping. Bake for 20 to 25 minutes, or until the top has turned to a nice golden brown. Remove from oven and let cool.

grapefruitEnjoy warm with a little bit of coconut oil or butter!

Chewy Cacao Bars

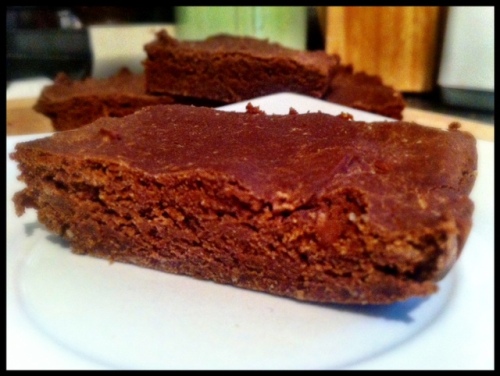
It didn’t take three weeks of restricted eating to start experimenting with baked goods; in fact, it didn’t even take three days.  I was in the kitchen on day two with my hands elbow deep in dry gooey sugarless dough trying to create the world’s best brownie-like bar – minus the sugar, butter, nuts, chocolate and wheat.

Not an ounce of doubt streamed through my blood…Not after seeing my coconut oil turn green from adding hemp butter to it, or watching my dough crumble before my eyes as I tried incorporating the green liquid into the dry ingredients, or even after trying to press the batter into the pan without having it stick to everything around me…Okay…Maybe I was skeptical after that…

It was an adventure to say the least.

I have since done three different takes on the somewhat same recipe and loved each and every one of them.  Adam’s hatred towards them, on the other hand, has exponentially increased each time and he is now at the point where he merely nibbles the corner of the already microscopic piece I have cut for him, turns his nose up, and quickly returns it to me.  I too have quickly caught on and begun cutting larger pieces in order to “sneak” in a second, or third, bar for myself.  You can’t put back an already chewed on piece, right? I am proud to say (or am I??) that I have officially eaten two pans of these bars — and am currently on my third — all to myself! Thank you, Adam.

So before making this recipe, do recognize that these are sugar free and you truly have to love the flavour of cacao to enjoy these.  Or you have to be on an extremely restricted cleanse and as a result will eat anything and love everything that is on the “green light” list of food.

And on that, I give you chewy cacao bars.

brownies

Chewy Cacao Bars

* yields 12, 2X4 inch bars

1 cup brown rice flour
2/3 cup buckwheat flour
2 tbsp. arrowroot powder
1/3 cup raw cacao powder
4 packets stevia (or 2 tsp.)
1/4 tsp gf baking powder
1/8 tsp sea salt

1 1/2 tbsp. chia seeds
3 tbsp. water
12-14 dates
water, just enough to cover the dates
1/4 cup coconut oil
1 tsp. vanilla extract
1/3 cup unsweetened apple sauce
1/4 – 1/3 cup non dairy milk

4 tbsp. raw cacao nibs
3 tbsp. unsweetened shredded coconut flakes
2 tbsp. hemp hearts

Method

1. Preheat oven to 350 degrees and line an 11 X 7 baking pan with parchment paper. In a small bowl combine chia seeds with the 3 tbsp. of water and set aside to gel up like an egg. In a small sauce pan, put the dates in just enough water to cover them and then bring to boil and simmer for about 10 minutes or until they soften. Stir in the coconut oil and vanilla and allow to melt.

2. Meanwhile in a large bowl combine the dry ingredients and set aside. In a food processor add the date/coconut oil mixture and blend into a puree. Blend in the chia egg, apple sauce, raw cacao nibs, coconut and hemp hearts. Then slowly begin to add in the dry mixture, alternating each addition with a little bit of milk to ensure the mixture doesn’t get too dry. The mixture will be quite dry and hard to blend but don’t fret. Blend until a dough ball forms.

3. With wet hands, transfer the dough to the prepared pan. Wet hands are important here as gluten free flours tend to be very sticky and it’s easier to maneuver if you’re hands are wet. Press the dough into flat and deep into the corners with wet fingers until it is completely set into the pan. Bake for 25 to 30 minutes until the top lightens and slightly cracks. Remove from oven and cool for about 15 minutes before removing it from the pan. Cut into squares, or cut as you go to ensure each piece is fresh and chewy. Once cooled completely, store in the refrigerator or freezer (if you have cut the pieces.) Enjoy!

brownies 2

This past month has been real transformation for me in terms of food as I have undergone quite an intense elimination diet to heal my digestion tract and rid my body of yeast, aka Candida overgrowth.  I have always felt that I lead a very balanced and healthy life by eating whole foods and being active and good to myself and yet over the holidays I found out that my internal organs are actually screaming at me and are seriously inflamed.  Sure I could have gotten a prescription filled out and continued living the way I did, but instead I listened to my heart, my mother and an alternative healer who advised me to cut certain food groups out of my diet for a period of time and to take some herbal supplements to aid and accelerate the mending time.

Some of the main items I had to cut out were cow dairy, refined sugar, yeast, wheat, caffeine, nuts, seeds, soy beans (excluding tempeh,) raw greens, beans (excluding chickpeas,) alcohol, onion, garlic, hot spices, and vinegar.  After seeing this list my stomach sunk; I really thought it was going to be impossible.  My whole diet was literally based on things like nuts, beans, raw greens, garlic, and HOT spices, and this was made very evident after hearing the list as my body was saying “HEY! Stop! I NEED a break!”

The first few days of January were very boring.  I was fuelling up on things like plain brown rice, steamed peas, avocado and plain sardines.  I actually felt like I was prematurely at an old-aged home; it was a food lover’s hell.  Eventually I had to step it up and show myself and poor Adam (who was forced to eat like me unless we began making two different meals) that elimination diets can be delicious, nutritious AND kind to my colon.

While I have done a lot of experimenting and tweaking of things like pancakes without wheat, brownies without sugar or dairy, and stir-frys without garlic, onion and spices, I thought I would begin with something basic, wholesome, and addicting: caramelized root vegetables.

I have made this side dish a few times now as it has been a hit over and over again.  While I have switched up a few of the vegetables each time, I have kept the basic glaze down and it is incredible.

Caramelized Root Vegetables

* serves 2, but can easily be adapted to suit larger crowds

1 large parsnip, peeled and cut into half moons
12 brussel sprouts, cleaned and sliced in half
4 stalks of celery, sliced diagonally in longer pieces
1/2 mango, diced into small chunks
1 tbsp. grapeseed oil
2 tsp. agave nectar
1 tsp. minced rosemary
1 tbsp. Bragg’s Liquid Aminos
Himalayan Rock Salt and Pepper, to taste
1/2 tsp. mild paprika

Method

1. Preheat oven to 425 degrees. Line a baking dish with aluminum foil so that it overlaps the walls quite a bit. Lay the vegetables and mango onto the foil and then pour on the grapeseed oil, agave, and Braggs. Sprinkle on the seasonings and then using your hands toss to coat.

2. Fold up the overlapping foil sides to create a tent around the vegetables. Bake for 25 minutes and then remove from oven. Unfold the tent and toss the vegetables. Return to the oven uncovered and bake for another 20 minutes. For the last 2 or 3 minutes of cooking, turn your oven to broil and watch closely so that the vegetables don’t burn but rather glaze and turn a deep brown.

Serve as a side to fish, tempeh or any other of your favourite dishes.

caramelized veg

This passed week has been an internal fight with myself in regards to studying or not studying.  And for some reason the latter has yet to be beat as I have been quite tactful at designing excuses in my strung-out-anxious head.  Whether it’s “I am too tired from working all day,” or “This may be the last sunny day for awhile,” or “I need to go to yoga to clear my head and get my sweat on,” or “I need to eat,” or “I need to eat but there’s no food in the house so I have to go grocery shopping,” or “I need to eat but I have to make something to eat and it has to be delicious and perfect,” or…Okay, I could go on.

Well this weekend when the excuse of “I need to eat but I have to make something to eat and it has to be delicious and perfect” popped up I turned to Adam for some insight and thought triggering.

Me: “What do YOU think I should make this afternoon?”

Adam: “All I can think of right now are things unhealthy…”

Me: “That’s okay; I am going to try to healthify it!”

Adam: “What about banana bread? Or ooh butter tarts? I love butter tarts.”

He left me alone shortly after and I scoured my head and cupboards for ingredients that screamed out butter tarts.  As I started sorting through different methods for healthifying butter tarts I slowly became discouraged as I pictured myself trying to make a “flaky, buttery” tart shell…I came to the conclusion that today was not the day.

(Events like these also contribute to the time I waste and list of excuses I create for not being able to study.)

Twenty minutes come and gone and I found myself still staring into the cupboard deciding on what the heck I was going to make and with what.  The only thing staring back at me was a can of tomatoes and a can of chickpeas.  Now there are not a lot of fantastic baked tomato pies out there, nor are there many chickpea strudels…But if you have spent any time in the blogging world recently you KNOW there has been a fare share of baked bean brownies.

Now I know it sounds a little strange, but most incredible food items are.

I had my first experience with a black bean brownie a couple of years ago when my sister decided to Saran Wrap a straight-from-the-oven black bean brownie in order to throw in her carry-on just before catching a plane across Canada to visit me.

Needless to say, it was a little smooshed.

But I was over joyed and could care less that it slightly resembled Little Bear’s fecal matter.  The black bean brownie was on the dryer side but I blame that entirely on the high altitude and had it been eaten in one time-zone it would have stood up to any fudge-tastic square because the flavours were there! I was going to give this poor black bean brownie a second chance…Two years later.

With chickpeas instead of black beans…Because that’s what I had.

For inspiration and moral support, I followed many of the same ingredients and measurements as Katie because she seemed to be able to fool all of her loved ones with a gooey chickpea blondie — Chocolate chips are blinding.

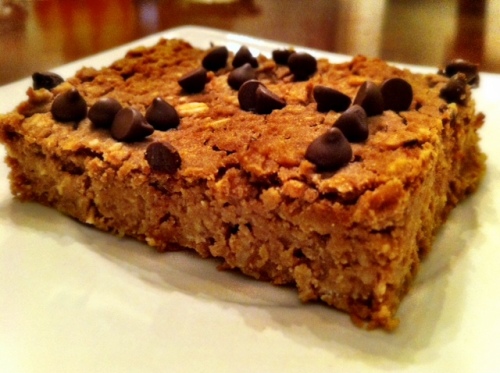
Now before you go crazy and think you’ve found your new go-to recipes for the best brownies ever, be warned that these DEFINITELY taste different and are more for people that get excited about biting their teeth into an almond-stuffed date and calling it an “oreo.”  But if that’s you then you’ll adore these; they’re gooey, chewy, doughy and just slightly sweet so you can eat them for breakfast, lunch and dinner and in between because I did…And nearly ate the entire pan at 10 o clock at night because I could…

Gooey Chickpea “Brownies”
** slightly adapted from Chocolate Covered Katie’s Chocolate Chip Blondies

Ingredients

1 can chickpeas, 540 mL
1/3 cup plus 3 tbsp unsweetened apple sauce
1/4 cup crunchy peanut butter, or another nut butter
1 tbsp cacoa powder
1 tbsp unrefined sugar
1 tbsp unsweetened shredded coconut
2 tsp vanilla extract
1/3 cup rolled oats
1/4 tsp salt
3/4 tsp baking powder
1/4 tsp baking soda
2 tbsp chocolate chips for sprinkling on top, optional

Method

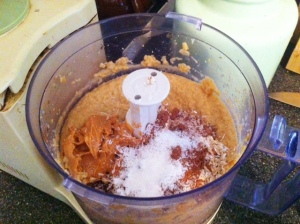
1. Preheat oven to 350 degrees and line a square pan with parchment paper. In a food processor begin processing the chickpeas. Slowly pour in the apple sauce to ease processing and fully incorporate it into the mixture.

2. Add in the remaining ingredients and process until fully combined.

3. Pour into the prepared pan and smooth until its flat and even. Sprinkle on the chocolate chips and bake for 25 minutes, or until the brownie has firmed up and has a crackle top. Hey? Crackle top? They’re definitely brownies then!

4. Let cool completely and then dig in.

I let mine cooling while I went to a yoga class. I spent shavasana “with my breath”…For 30 seconds. But my mind kept bouncing back to the brownies cooling on my counter.

When I got home I screamed with joy “DID YOU SEE WHAT I MADE?!”

Adam: “Ya! You made brownies!”

Me: “You can tell what they are?”

Adam: “Ya. I’m offended that you would think that I wouldn’t be able to tell…”

Me: “Well, they’re not exactly brownies…”

Later…

Me: “So did you try my brownies? Did you like them?”

Adam: “Umm not really.”

Me: “Well they were made with chickpeas.”

Adam: “Umm ya, I could definitely tell something wasn’t right. Now that you tell me that, ya they were good…But I could use a little sugar…”


So there you have it. I loved them. Adam could hold off. Oh well, more for me!

The Golden Touch

Growing up in a small town, you eventually begin to accept that there is only one “grocery” store, one gas station, and one convenience store (that also acts as your post office and pharmacy.) If you forgot to pick up bulk toilet paper when you were “in the city” you’d either cross your fingers that you didn’t run out before you returned to the “city” or you paid the price of gold for two rolls of one-ply toilet paper.

It was a rough life…

But at least we had one restaurant. Or rather, one restaurant that was worth stepping into. What is it about small towns that have more restaurants per capita than it does toilet paper rolls? Think on that one for a minute…

Fortunately, the one restaurant we had happened to be one of the best restaurants in all of the neighbouring towns and cities as well. My family would go to the Gasthaus for all major celebrations: birthdays, the last day of school, and “business lunches.”

I recall one “business lunch” quite fondly. It was the first time I had ever tasted butternut squash soup. In fact, it was the first time my sister, my mom AND I had ever tasted butternut squash soup and we nearly died and went to heaven on our ladies’ day out…Or err, business lunch.

I don’t know what it was that made it so incredible; it quite possibly could have been the sketch of a steaming bowl of soup on the sidewalk chalkboard outside, or the fact that we were eating outside on a patio in November, or that we were even ON a patio out on the “town” for a lunch that was not our birthday, or it could have been the crusty white pretzel roll that accompanied it, or even the in unison “mmmm’s and ahh’s” that accompanied each bite. But I think it was the touch of maple syrup, the cinnamon, the nutmeg, and the velvety butternut squash…On top of everything else that made it the absolute BEST roasted butternut squash soup we had ever had.

And that has remained tried and true…Until tonight. The night I created the out-of-this-world-BEST roasted butternut squash soup — With a twist. Because everything is better with a twist.

Golden Butternut Squash with Roasted Garlic and Cranberries

Makes about 8 – 10 cups

1 large butternut squash, roasted and cubed, or about 3 cups canned squash
1/2 head of garlic, roasted
2 small onions, roughly chopped
2/3 cup fresh cranberries
3 cups vegetable stock
1/2-1 cup water
3 tbsp fresh thyme, minced
2 tsp. poultry seasoning (or a blend of sage with thyme, marjoram, rosemary, or savory)
2 bay leaves
1/2 tsp. cinnamon
1/2 tsp. cumin
1/2 tsp. cayenne
Herbimare or salt and pepper, to taste
1 tbsp olive oil
1 tbsp grape seed oil

Method

1. Preheat oven to 400 degrees. Cut squash in half lengthwise and drizzle on a little bit of olive oil and salt (or Herbamare) and pepper. Lay cut side down on parchment paper. Wrap half a head of garlic in tinfoil and place along side squash. Roast in oven for about 45 minutes or until most of the squash can be easily scooped out and the garlic squeezes out of its clove.

2. Clean up a bit and then begin preparing the rest. You can take extra time here as it does not take 45 minutes. In a large pot, heat the grape seed oil and then add the chopped onion. Saute for about 5 minutes and then add the cranberries. Continue sautéing until you hear the cranberries begin to pop. Add in the fresh thyme and remaining seasonings.

3. Once the squash has roasted, remove from oven to let cool. Then begin scooping out the flesh to add to the onion mix. For the slightly more tender bits, peel back the skin and cube with a sharp knife. Add to the pot, and then squeeze in the roasted garlic. Stir in the vegetable stock so that all of the ingredients are submerged in the liquid. If there is not enough liquid, add in the optional 1/2 to 1 cup water. Bring to a boil for about 15 to 20 minutes so that all of the flavours unite.

4. Transfer in small batches to a blender and puree until it reaches a velvety smooth consistency. Continue doing this until the whole batch is pureed.

I served mine with a crumble of goat cheese, but a drizzle of yogurt would work too, or all on its own. It can stand on its own. I tested it. Tried and true.

With the subtle hint of cranberry and the lingering thyme and sage, this soup is definitely the perfect meal for a crisp autumn day.

You may even momentarily forget that you didn’t pick up toilet paper in town.

PS. What do you think of the new blog layout/design? Oh and check out the recipe page now. Let me know your thoughts!!

The Not-So Chili

There’s something about fall and its relationship with school that makes large batches of something hearty and comforting quite appealing.  After a long day of staring at a computer screen and text books there’s really nothing better than returning home to a “ready in minutes” bowl of _____.  I’m leaving that space open for anything as at the end of the day exhaustion paired with the lack of motivation in me to cook lessens my culinary judgement and, I really would eat ANYTHING.

Well today that’s all I needed and wanted.  The only thing that got me through my chemistry lab of mixing some clear liquid with some other clear liquid to eventually produce a green powder (I was ready to eat that powder at one point — it was highly condemned) was the thought of coming home to a big pot of warm deliciousness.

However that was only a thought, a day dream, rather.  The reality was there really was no big pot of warm deliciousness…Until I made it; so, that’s what I did.

What started as chili quickly turned into a TAKE ON chili when I discovered I didn’t actually have any chili powder.

So I bring you the perfect fall meal: Harvest Vegetable Chili with a Twist.

Harvest Vegetable Chili with a Twist

Ingredients

1 tbsp grapeseed oil
1 small yellow onion, diced
1 green pepper, chopped
1 orange pepper, chopped
1 large carrot, diced
4 sticks celery, diced
1 cup cremini mushrooms, cubed — about 4-5 mushrooms depending on size
2 cloves garlic, minced
3/4 cup pumpkin puree
1/4 cup coconut milk
1 can (540 mL) kidney beans
1 can (540 mL) bean medley, or make your own: garbanzo, romano, white bean etc.
1 large can (740 mL) crushed tomatoes
1 tbsp unsweetened apple butter
1/2 cup water, from rinsing out tomato can
1 tsp curry powder
1 tsp cumin
1/2 tsp oregano (strange…I know, but trust me)
1/2 tsp cayenne pepper, or more, to taste 🙂
1 tsp tumeric
1 tsp cinnamon
1/2 tsp nutmeg
1/2 tsp cloves
Salt (or herbamare) and Pepper, to taste

Method

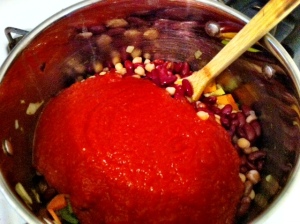
1. In a large pot on medium heat, pour in grape seed oil. Add the onion, peppers, celery, and carrots, and sauté for 5 minutes. Add in the mushrooms and garlic and continue sautéing until onion is translucent.

2. Stir in the beans and tomatoes, and water.

3. Add in the pumpkin and coconut milk. Add in all of the spices and apple butter; let simmer on medium until bubbles form on the top.

4. Reduce the heat to low and cover for about 35-40 minutes or until the vegetables are tender yet still have a “bite” to them.

Serve over a bowl of brown rice or if you have more time on your hands throw together a batch of cornbread, because nothing goes better with chili, or not-so chili, than cornbread.  I sprinkled on some nutritional yeast and put a dollop of greek yogurt on top for extra protein and deliciousness!

This chili just takes a few minutes to throw together and then it’s all about playing the waiting game. To speed up that game I quickly cleaned and then went for a run to take full advantage of the nearly 20 degree clear blue sky weather in mid October.

And even though I had to completely adapt the spices and then add other ingredients (coconut milk and pumpkin??) to compliment them, this large batch of “chili” really was a bowl of deliciousness…And Adam will second that with a bronze medal! While he clearly lost this round of the waiting game, I did get a message of earnest approval during my run: “Mmmmmhhhmmm awesome chili love!”

Yes…Chili… 😉

Pumpkin Cookie Pie

I would be lying if I said that it still isn’t, but growing up dessert was definitely my favourite part of any meal.  It was the meal that I ate the slowest so that everyone else around me would have to watch and waaait (and wish they too had eaten it slower) while I enjoyed every last bite.  But one dessert I could always anticipate and not look forward to was the one that followed any Thanksgiving or Christmas dinner: pumpkin pie.  Unless it was drowning in whipping cream to cover the overpowering bitter pumpkin flavour and the tasteless crust I wanted nothing to do with it.

So many a Thanksgiving’s and Christmas’s I would be the one sitting and watching while everyone ate and raved about their favourite dessert…After a few times of doing this I realized that I must be missing something! There is not a lot of food that I don’t like, and the fact that every single other family member dies for the taste must give the squash SOME credit.

And so I tried it, again. And again.  Repeating “I do love pumpkin, I do love pumpkin…” at each bite. And while dessert isn’t something you should try to grow into, I felt like pumpkin pie was one I should.

Well let’s just say that I agree with those who say that palates can advance or mature, because pumpkin is now at the top of my list of favourite foods.  Give it to me for breakfast, lunch, dinner, or all three and I’ll be happy…That is the pumpkin we’re talking about, the pie part not so much.

It might be the texture, the colour, the taste, or all three, but I canNOT develop a palate for pie crust.  So rather than trying to force myself to like this blend of white flour and butter I decided to go out on a hunt for another shell to cradle my pumpkin and last year I found it. Last Christmas to be exact.  After trying out Angela’s (OhSheGlows) recipe for gluten free pie crust made with pecans, I realized that this is hand’s down the very best pumpkin pie I have ever eaten, and decided that it would be from here on out my go-to recipe.

That was until this year when I found out one of my dinner guests was allergic to nuts.

Great.

It was either I go out on a hunt for yet another incredible pumpkin dessert recipe (there is one) or I take the skills I have developed from working in a gluten free and nut free bakery and create my own version of the “pecan” pie crust.

And so I did.

And so it was delicious.

Mighty, mighty delicious.

Crunchy Pumpkin Cookie Crust
* adapted from OhSheGlows Sweet and Salty Spiced Pecan Crust

Ingredients

1 1/4  cups rolled oats (gf if necessary,) ground into a flour
1 3/4 cups raw pumpkin seeds
1/4 cup brown rice syrup
2 tbsp coconut oil, melted
3 tbsp ground flax
2 tbsp raw cane sugar
2 tsp cinnamon
1 tsp nutmeg
1 tsp ginger
1 tsp cloves
1/2 tsp sea salt

1. Preheat oven to 350 degrees. In a food processor or a Vitamix, blend the rolled oats into a very fine flour and set aside in a large bowl.

2. In a food processor, grind the pumpkin seeds for about 4-5 minutes (depending on how powerful your machine is) or until the oils begin to release and the grinds can form into a ball without crumbling apart. This does take quite a bit of time so I suggest stopping and testing out balling the grinds as you don’t want it to be too dry or turn into butter!

3. Add the ground pumpkin seeds, along with the rest of the ingredients, to the oat flour and blending. I recommend using your hands to fully incorporate all of the ingredients into a “smooth, buttery” ball. If the mixture is falling apart, add just a touch more coconut oil.

4. Pour mixture into a nonstick or greased pie pan and begin pressing into the sides of the plate. This is the most time consuming part but really is easy; just press with the pads of your fingers up the sides and along the bottom to ensure equal distribution and compactness. Poke the base of the pie several times to allow thorough baking, and then put in oven for about 12 minutes.

5. Remove from oven and let cool while you prepare the filling. I used Angela’s filling almost exactly except for subbing coconut oil for Earth Balance so you can check it out there if you want a completely vegan and gluten free recipe.

6. Pour the filling into the crust and cover the surrounding crust edge with tinfoil to avoid burning. Bake for 50 minutes and then remove from oven. Let cool and then chill overnight.

I recommend taking out the pie about an hour before serving as the crust does get quite hard — This will ensure easier cutting but like Angela, I encourage the use of a very sharp pointed knife to get through. And even though Adam thoroughly enjoyed the pie, he recommends using a serrated knife (and fork, if you allow those in your home!) for eating. I served this with whipped coconut “cream,” and it was UNREAL.

Feel free to make this anytime! As I have learned from repeated exposure, take advantage of the bountiful pumpkins at this time of year…And eat them for breakfast, lunch and dinner! (And no mom, I am not actually eating them three times a day….. :))